HTTP请求
大家都知道nginx作为webserver和http的代理,处理的就是http请求。http请求是是建立在tcp基础上的。
一个完整的http请求包括request和response两部分。request组成:请求行, 请求头, 请求数据response组成:状态行, 消息报头, 响应正文
我们在终端下发起一个HTTP请求:
1 | [root@hongshaorou ~]# curl -v www.baidu.com > /dev/null |
大于号部分是请求部分,小于号部分是响应部分
Nginx虚拟主机
多套业务服务如何配置?
是多个主机还是一个主机配置多个虚拟主机?答案是虚拟主机。
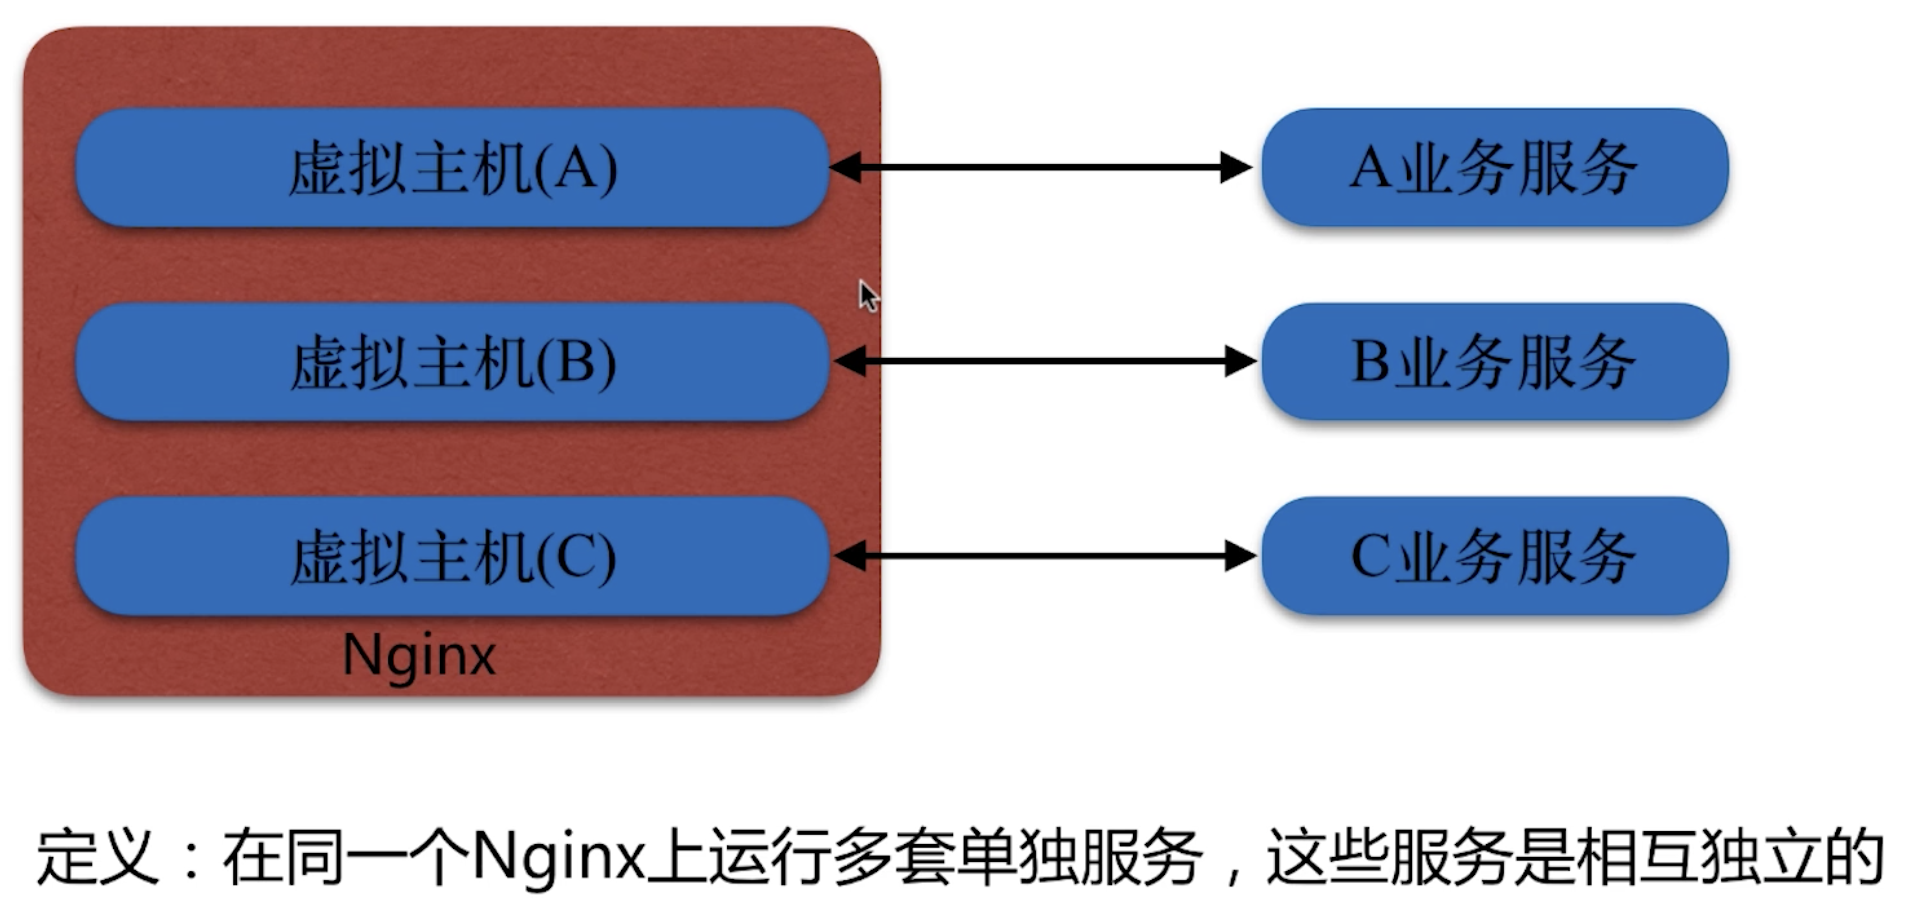
虚拟主机:在同一个Nginx上运行多套单独服务,这些服务是相互独立的。
虚拟主机配置方式主要有三种
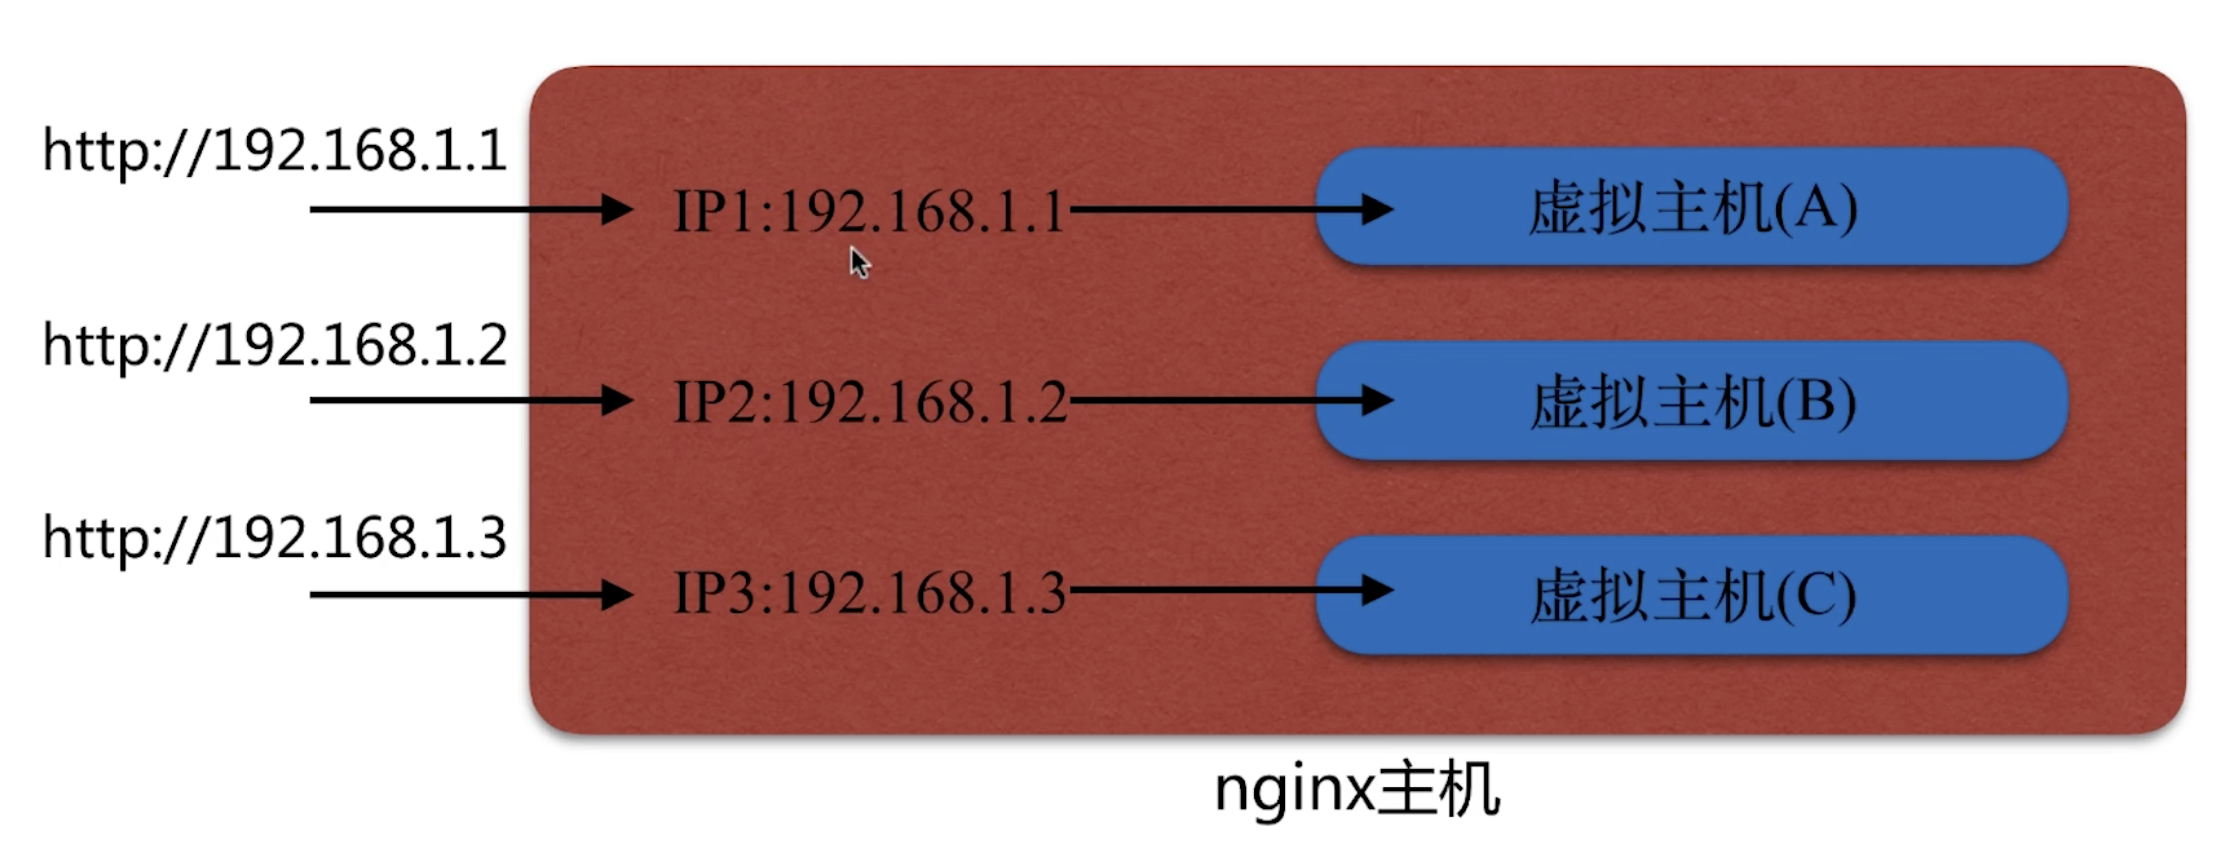
方法一:基于主机多IP的方式
就是在一个主机上配置多个IP,只用同一个Nginx来针对不同的IP来提供对外服务。
方法二:基于端口的配置方式
不同的虚拟主机监听的端口是不一样的,通过端口区分不同的虚拟主机。

方法三:基于多个host名称方式(多域名方式)
根据不同的主机名(域名)进行配置
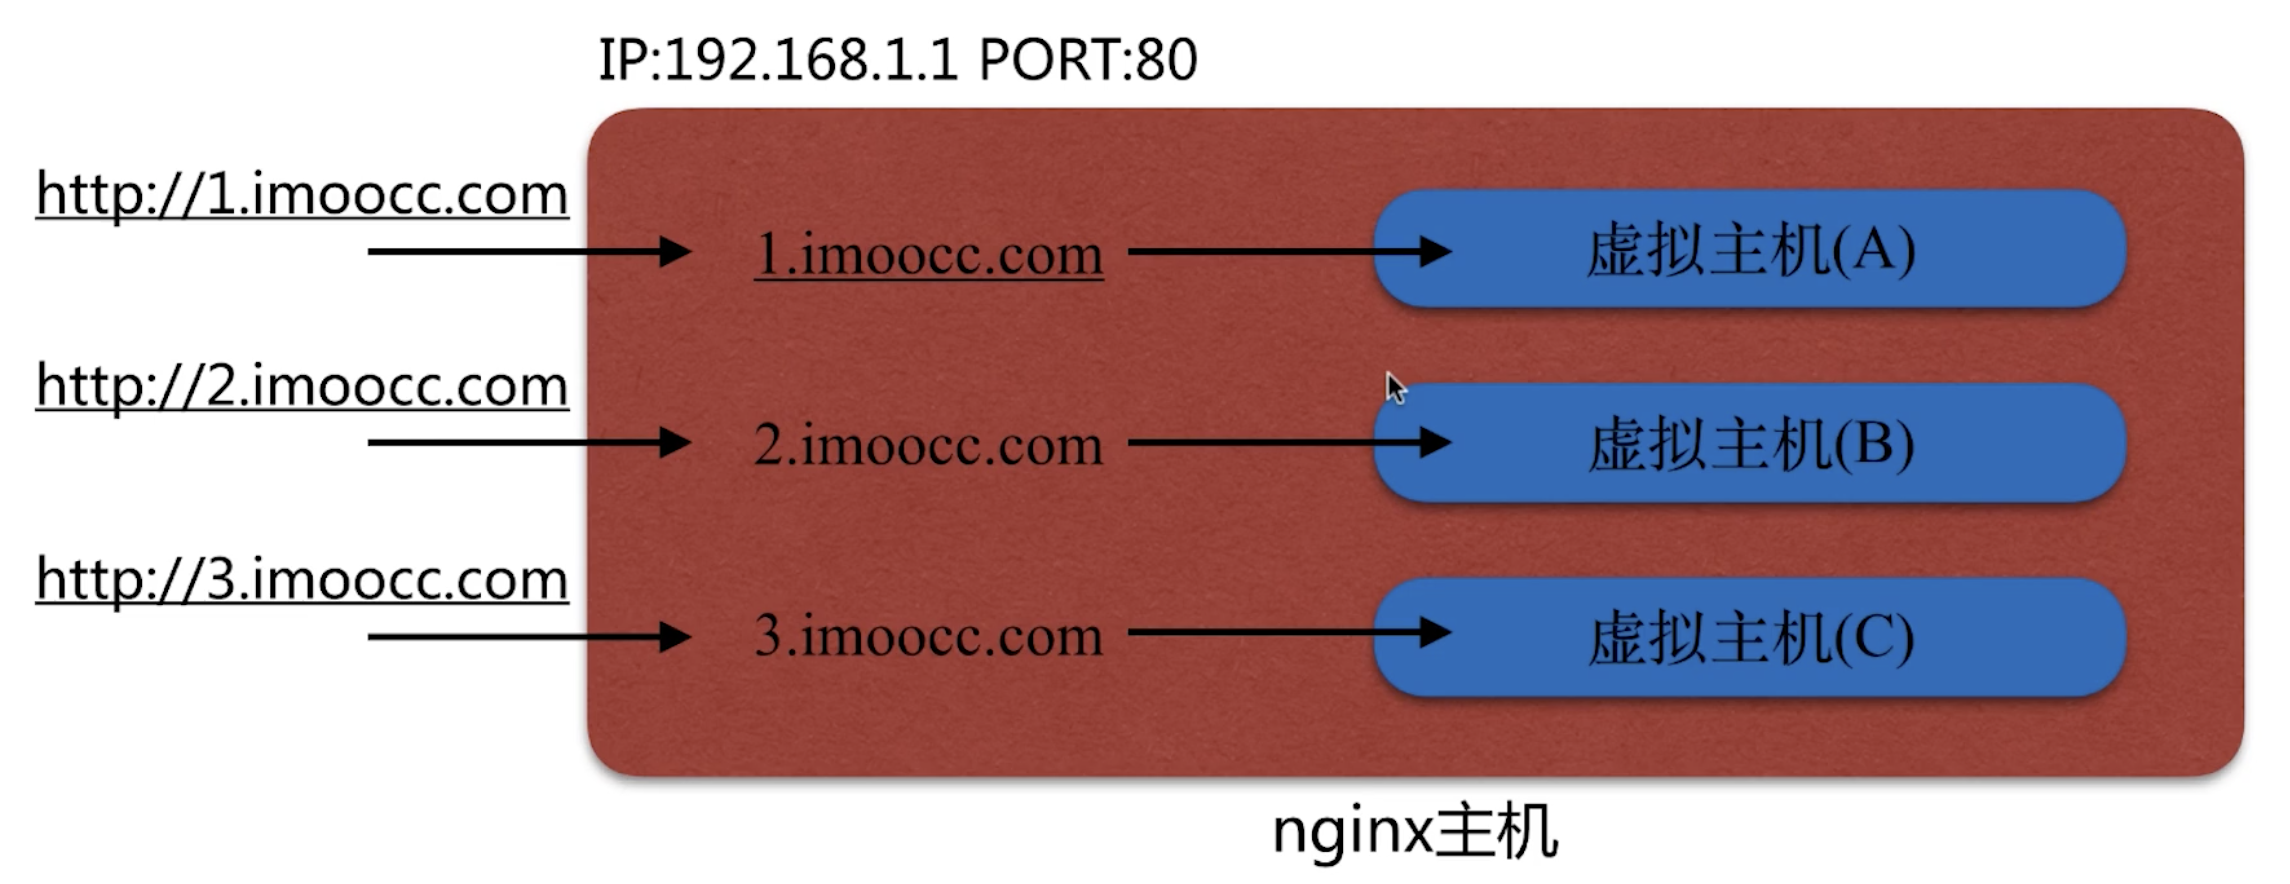
监听的还是一个IP和端口
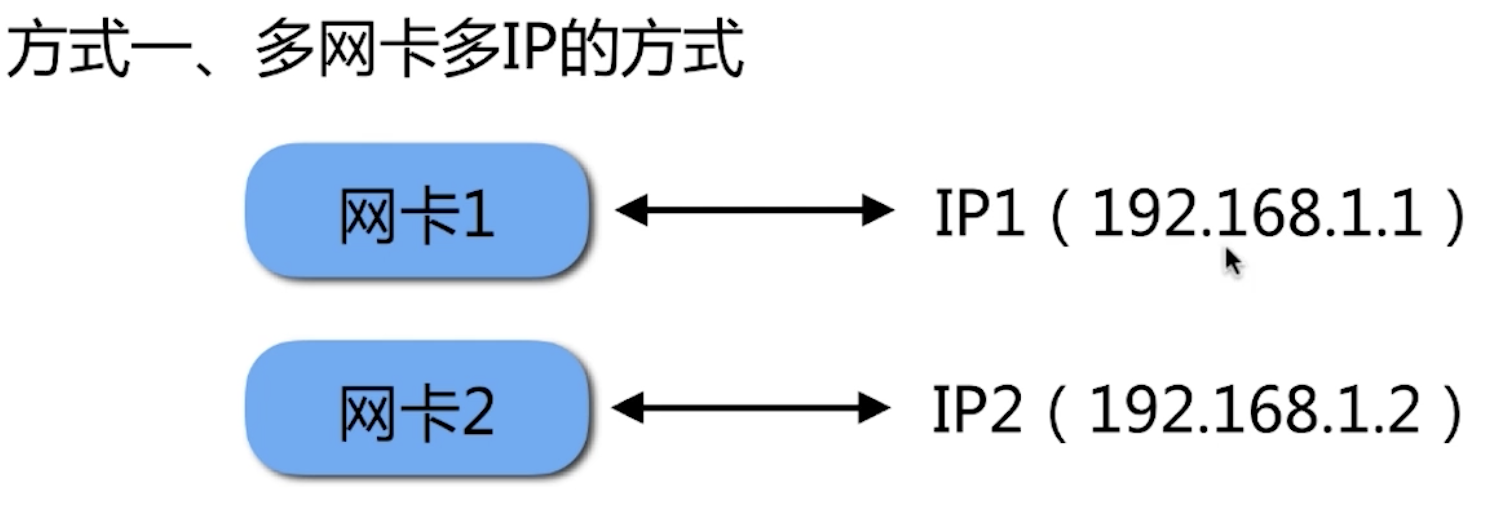
基于主机多IP的方式
该方式重点是在主机上实现多IP的绑定,主机多IP也分两种方式:
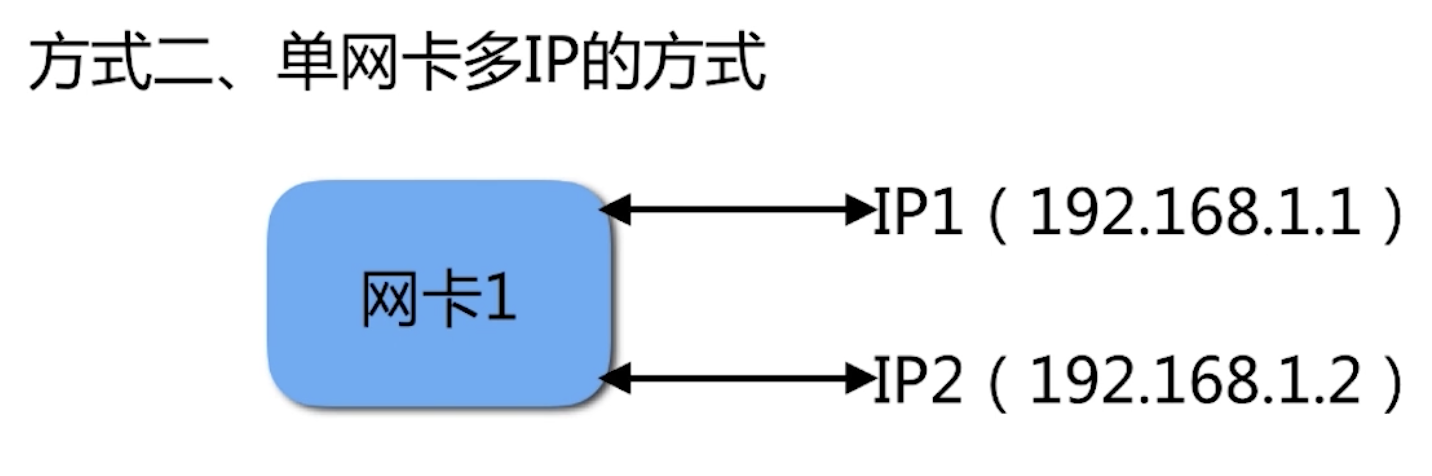
我们使用本地虚拟机实现单网卡多IP的方式:
1 | # 添加一个局域网内没有被使用的ip 将其添加到 设备 eth1 上 |
1 | [vagrant@docker-host conf.d]$ pwd |
重启Nginx服务
1 | nginx -s stop -c /etc/nginx/nginx.conf # 停止 |
基于多端口的配置
基于端口的配置和基于IP的类似,不过我们要注意设置的端口不要和其他虚拟主机的端口以及本地程序的端口有冲突。
1 | [vagrant@docker-host conf.d]$ ss -luntp |
我们可以使用ss -luntp (centos6使用netstat -luntp)查找本地正在被使用的端口。
我们设置端口配置虚拟主机
1 | [vagrant@docker-host conf.d]$ head vserver1.conf |
1 | # 检查配置语法是否有误 |
这样我们可以指定端口访问对于的虚拟主机:http://192.168.205.10:81/ http://192.168.205.10:80/
基于HOST域名的配置
将域名和主机IP对于关系设置到本机的/etc/hosts
1 | 192.168.205.10 1.imooc.com |
修改虚拟机的配置
1 | [vagrant@docker-host conf.d]$ head vserver1.conf |
Nginx日志类型
包括:error.log access_logerror.log主要是处理http请求错误和nginx本身服务错误状态,按照不同的错误级别记录access_log 主要是记录处理每次http请求访问的状态
日志主要实现方式是使用 log_format
nginx记录的每次信息都可以当做一个变量,log_format就是将这些变量组合起来,记录到日志中去
我们看一下log_format的配置1
2
3Syntax: log_format name [escape=default|json] string …;
Default: log_format combined "...";
Context: http (约束log_format的配置位置)
1 | # 配置错误日志 |
上面的error.log后面表示错误等级。
下面的access.log后面的main表示使用上面的log_format。
Nginx大致有三类变量能够记录在log_format 中
- HTTP请求变量-
arg_PARAMETER(请求参数)http_HEADER(请求头信息)send_http_HEADER(服务端返回) - 内置变量-
Nginx内置的 - 自定义变量- 自己定义的
对于nginx的内置变量,我们可以查看官网信息:
我们看一下默认的log_format1
2
3
4
5log_format main '$remote_addr - $remote_user [$time_local] "$request" '
'$status $body_bytes_sent "$http_referer" '
'"$http_user_agent" "$http_x_forwarded_for"';
access_log /var/log/nginx/access.log main;
我们看到默认的格式,基本都是单引号''包裹着一些变量,还包括 中划线-方括号[]作为分隔符一起打印。
每个变量都有这含义:
1 | remote_addr:对应客户端的地址 |