secure_link_module模块
作用:
- 指定并允许检查请求的链接的真实性以及保护资源免遭未经授权的访问
- 限制链接生效周期(资源有有效期)
配置语法
1 | Syntax: secure_link expression; |
1 | Syntax: secure_link_md5 expression; |
我们看下secure_link_md5的验证:
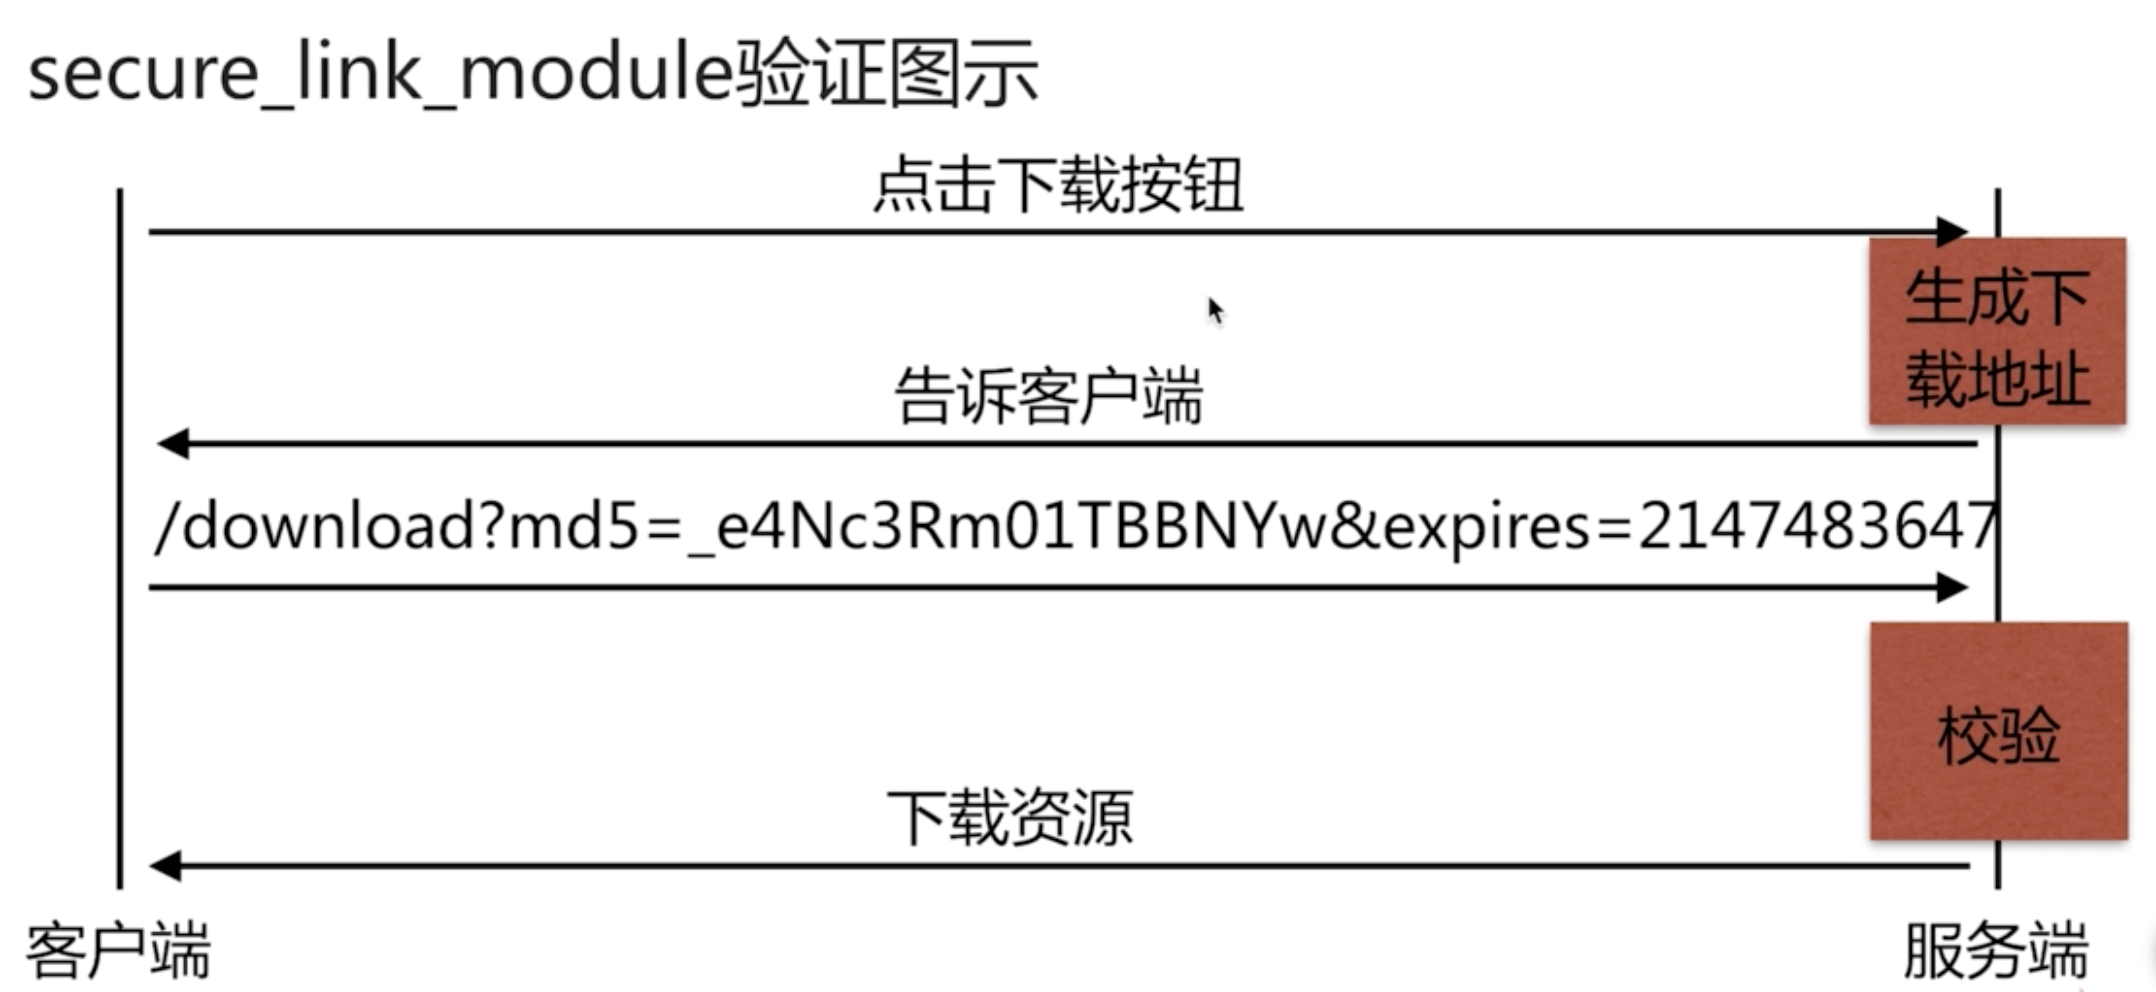
当用户点击下载按钮之后,发送一个请求到服务端,服务端生成一个具有一串密钥和过期时间的地址返回给客户端。客户端重新发起请求后会校验md5和过期时间。然后做出一系列操作。

对于md5的加密我们可以指定和远程IP或请求路径等以及我们准备好的一个密钥进行加密。服务端保存这个密钥。验证的时候会在Nginx进行验证。
secure_link模块实现请求资源验证
配置
1 | server { |
secure_link $arg_md5,$arg_expires;这一行表示获取到请求链接的md5和expires这两个参数的值。
secure_link_md5 "$secure_link_expires$uri imooc"; 表示使用secure_link_expires uri和imooc(这个imooc就是密钥)进行加密和上面获取到的的数据比较。
具体生成链接请参考老师的脚本
1 | !/bin/sh |
这样我们就可以对资源进行更安全的权限控制。
Geoip读取地域信息
基于IP地址匹配MaxMind GeoIP二进制文件,读取IP所在地域信息。
场景:
一、区别国内外做HTTP访问规则:如果有两台服务器国内,和国外一台,国内用户访问国内服务器,国外用户访问国外服务器,访问不同的资源。
二、区别国内城市地域做HTTP访问规则。(因为有城市对应的编码信息)
我们要安装对应的库
1 | [root@hongshaorou nginx]# yum install nginx-module-geoip -y |
安装模块存在/etc/nginx/modules
1 | [root@xiaoyang modules]# pwd |
1 | # 编辑nginx.conf文件,加载该模块,加入配置 因为不是默认编辑进去的 所以要主动load进来 |
下载maxmind文件库
1 | wget http://geolite.maxmind.com/download/geoip/database/GeoLiteCountry/GeoIP.dat. |
解压
1 | gunzip GeoIP.dat.gz GeoLiteCity.dat.gz |
在conf.d目录下配置
1 | # 上面解压的目录 |
我们浏览器访问获取到自己的IP国家信息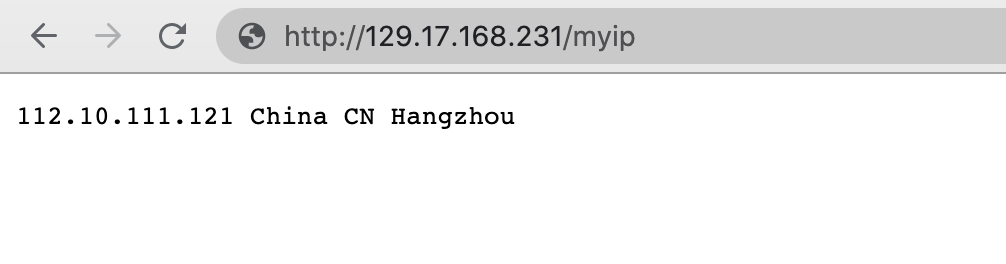
期待以后工作能用到 😊