模块讲解
nginx的模块有官方模块和第三方模块之分。
我们在终端中可以查看nginx加载的模块有哪些1
2
3
4
5
6
7
8
9
10
11
12
13
14
15
16
17
18
19
20
21
22
23
24--with-compat
--with-file-aio
--with-threads
--with-http_addition_module
--with-http_auth_request_module
--with-http_dav_module
--with-http_flv_module
--with-http_gunzip_module
--with-http_gzip_static_module
--with-http_mp4_module
--with-http_random_index_module
--with-http_realip_module
--with-http_secure_link_module
--with-http_slice_module
--with-http_ssl_module
--with-http_stub_status_module
--with-http_sub_module
--with-http_v2_module
--with-mail
--with-mail_ssl_module
--with-stream
--with-stream_realip_module
--with-stream_ssl_module
--with-stream_ssl_preread_module
http_stub_status_module模块:
1 | 编译选项:--with-http_stub_status_module |
主要用于展示当前处理链接的状态,用于监控链接信息
配置语法:1
2
3Syntax:stub_status;
Default:—— # 默认没有配置
Context:server,location # 配置的上下文
我们在默认配置文件中做如下配置
1 | location /mystatus { |
1 | [vagrant@docker-host conf.d]$ sudo nginx -t |
完成检查重启之后再浏览器中输入IP+mystatus将获得如下输出
1 | Active connections: 3 |
第一行展示的是当前活跃连接数
第二行第一个数字表示nginx接受的握手的总次数,第二个表示nginx所处理的连接数,最后一个表示请求数。正常情况连接数和握手数是相等的,表示没有丢失。
最后一行分别表示读写等待的数量,最后一个等待表示开启长连接时(keep-alive),客户端服务端既没有读也没有写仅仅建立连接的数量。
–with-http_random_index_module模块讲解
1 | 编译选项:--with-http_random_index_module |
配置语法:1
2
3Syntax:random_index on | off;
Default:random_index off; # 默认关闭
Context:location
我们修改默认配置如下
1 | location / { |
这样我们可以在/opt/app/code目录下放几个页面作为首页,当请求对应连接的时候会随机展示页面。
不会选择指定目录下以
.开头的文件(隐藏文件)
–with-http_sub_module模块讲解
1 | 编译选项:--with-http_sub_module |
该模块是用于Nginx服务端在给客户端response内容的时候,进行HTTP内容更换。
语法:1
2
3Syntax: sub_filter string replacement; (string表示要替换的内容,replacement表示替换后的对象)
Default: —
Context: http, server, location
1 | 句法: sub_filter_last_modified on | off; |
该模块用于判断每次请求的服务端内容是否发生变化,当发生变化的时候返回给客户端,当没有发生变化的时候,不再返回内容。主要用于缓存。
1 | 语法: sub_filter_once on | off; |
字符串替换一次还是多次替换,默认替换一次,如果off,那么所有的都会 被替换
详细例子参考文章:nginx替换网站响应内容
我们做了一个页面,里面是下面的信息
1 | [root@xiaoyang code]# pwd |
现在使用sub_module进行数据替换。
1 | location / { |
这样配置之后 我们查看下网页的变化
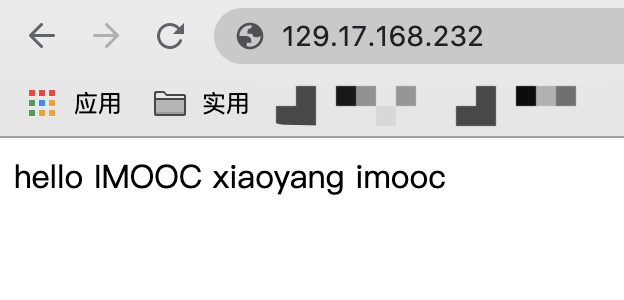
只有一个imooc发生了改变,这是因为默认只替换一个。
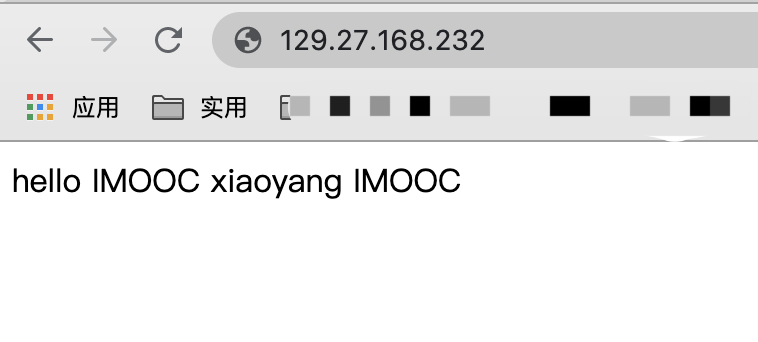
修改下配置文件:
1 | location / { |
Nginx的请求限制
连接频率限制配置语法于原理
连接频率限制: limit_conn_module
请求频率限制: limit_req_module
我们知道HTTP协议是基于TCP的,如果要完成一次HTTP请求的时候,首先进行TCP的三次握手。当建立连接的时候就可以进行请求和响应。
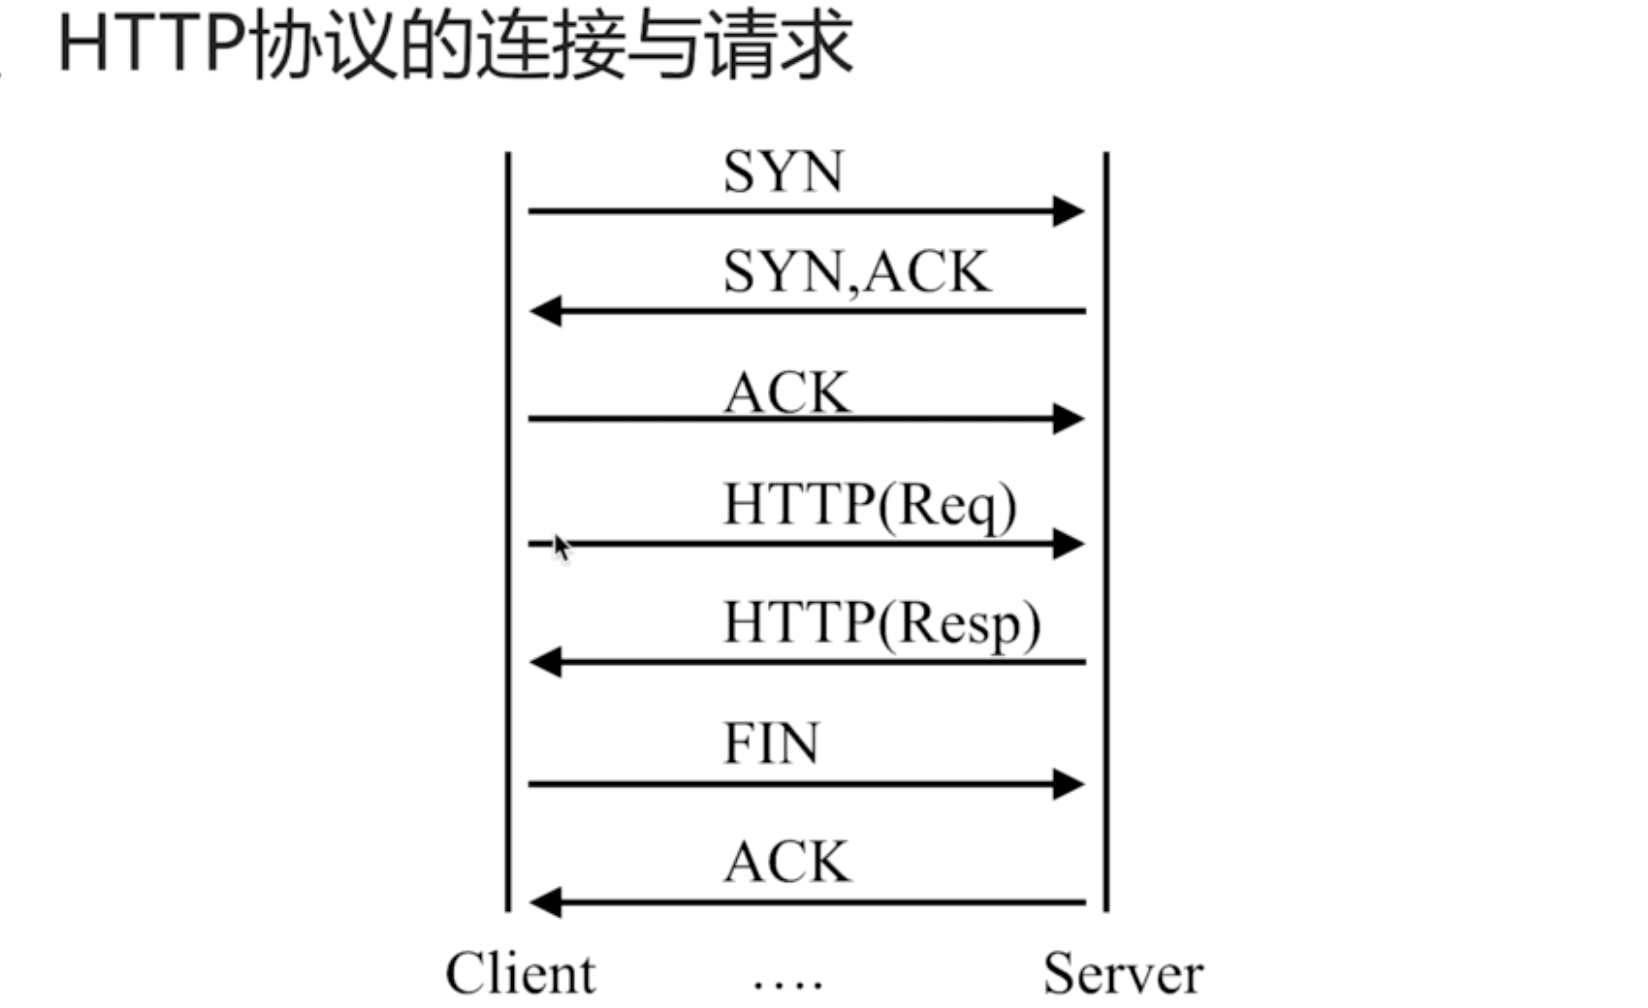
我们看下HTTP协议版本与连接关系
| HTTP协议版本 | 连接关系 |
|---|---|
| HTTP1.0 | TCP不能复用 一个连接 |
| HTTP1.1 | 顺序性TCP复用 |
| HTTP2.0 | 多路复用TCP复用 |
总结:
HTTP请求建立在一次TCP连接基础上
一次TCP请求至少产生一次HTTP请求(可以有多个)
对于 limit_conn_module模块(连接限制):
该nginx_http_limit_conn_module模块用于限制每个定义的密钥的连接数量,特别是来自单个IP地址的连接数量。
并非所有连接都被计算在内 只有在服务器处理请求并且已经读取了整个请求头时才计算连接。
对于连接限制的配置:1
2
3
4
5
6
7Syntax: limit_conn_zone key zone=name:size;
Default: —
Context: http
Syntax: limit_conn zone number;
Default: —
Context: http, server, location
对于第一部分可以理解在内存中开辟一个区域对于指定的nginx变量(key,例如:binary_remote_addr)进行限制。name表示申请的空间的名字,size表示申请空间的大小。
既然我们需要对连接进行限制,那么我们就需要存储连接对应的状态,我们从操作系统中开辟出一块空间进行存储这些连接状态,这块空间就是zone。
对于第二部分zone就是第一部分设置的名字name,number表示进行并发的限制。例如设置为1,表示一个时间段只能有一个。
对于nginx_http_limit_req_module模块(请求限制):
用于限制每一个定义的密钥的请求的处理速率,特别是从一个单一的IP地址的请求的处理速率。限制是使用“泄漏桶”方法完成的
对于请求限制的配置:1
2
3
4
5
6
7Syntax: limit_req_zone key zone=name:size rate=rate;
Default: —
Context: http
Syntax: limit_req zone=name [burst=number] [nodelay];
Default: —
Context: http, server, location
对于第一部分配置和连接配置相似,rate表示速率,以秒s为单位(rate=1r/s)
对于第二部分zone就是第一部分设置的名字name,[]内为可配置选项。
🌰
1 | limit_conn_zone $binary_remote_addr zone=conn_zone:1m; |
我们看到上面为定义zone,第二行是请求定义,表示对远程请求进行每秒一次的请求限制。这里的binary_remote_addr和remote_addr代表的含义是一样的(远程主机的IP)只是使用binary_remote_addr存储一个IP会比remote_addr省10个字节。
按照上面配置,每秒只能有一次请求,通过压力测试请求20次查看请求成功次数。
1 | ab -n 20 -c 20 url |
1 | Concurrency Level: 20 |
有19次非200非返回。
我们再看一个配置
1 | location / { |
我们对配置进行一下解释:
nodelay表示其他的不延迟立即返回
burst=3 表示当我们的请求速率超过配置的rate=1r/s将会遗留三个到下一秒执行来对客户端进行延迟响应
看下压力测试的输出
1 | Concurrency Level: 20 |
20个请求1个成功16个失败3个放到下一秒。
🌰🍐
1 | location / { |
配置解释:
服务端在同一时刻,只允许一个IP连接。
连接限制相比于请求限制的影响更小,因为只要有一个连接成功就会发起多次请求。
Nginx的访问控制
nginx的访问控制主要分为两类:
- 基于IP的访问控制
http_access_module - 基于用户的信任登录
http_auth_basic_module
http_access_module模块:
模块允许限制访问某些客户端地址。访问也可以通过密码子请求结果或JWT来限制满足控制地址和密码的同时访问限制。
配置语法:1
2
3
4
5
6
7Syntax: allow address | CIDR | unix: | all;
Default: —
Context: http, server, location, limit_except
Syntax: deny address | CIDR | unix: | all;
Default: —
Context: http, server, location, limit_except
语法中address表示地址,CIDR表示网段。unix:指定了特殊值,则允许访问所有UNIX域套接字。all表示所有的。
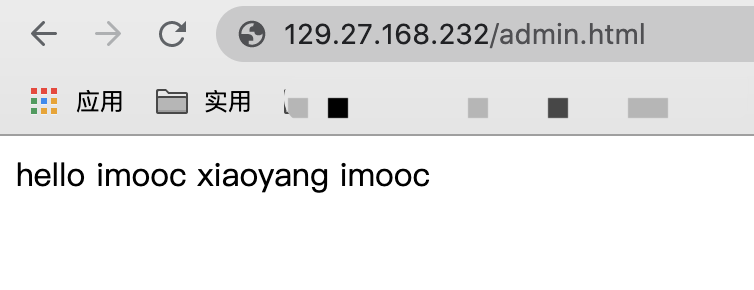
1 | location ~ ^/admin.html { |
配置说明:
这里的 ~表示匹配 以/admin.html访问到该location
当我们直接用本地IP访问的时候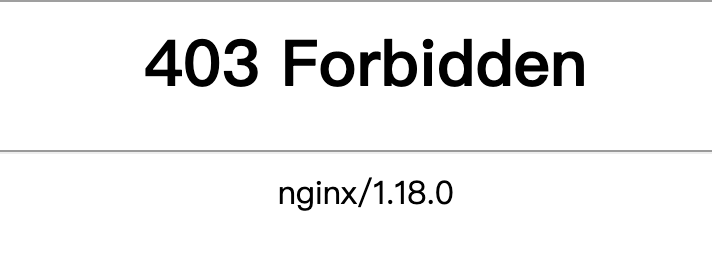
我们开启代理看看 可以访问
先在我们更改一下配置,拒绝所有的,但是允许当前主机。
1 | location ~ ^/admin.html { |
http_access_module局限性
我们看下下面的图就很容易理解局限性了
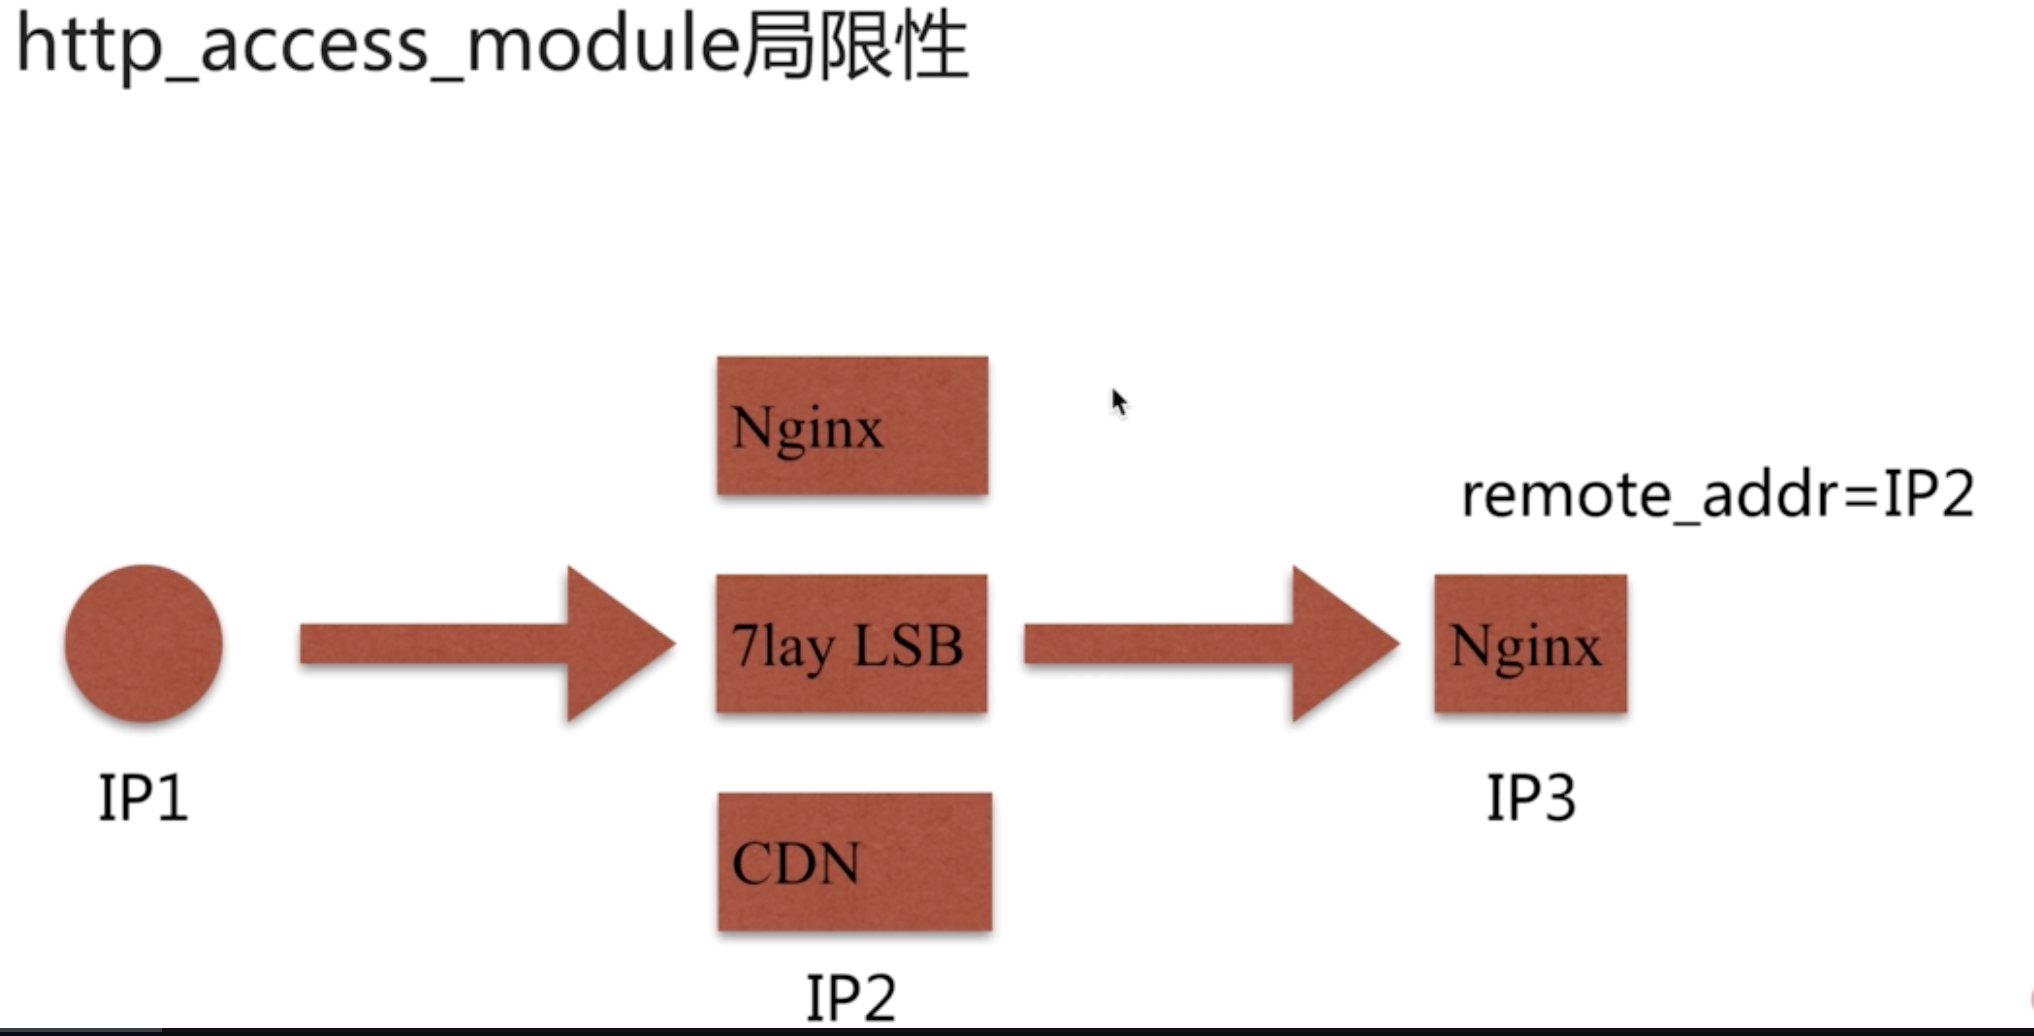
nginx的访问控制限制是针对客户端的IP来进行限制的,但是nginx并不确定真正的客户端是哪个,凡是和nginx进行交互的都被当做是客户端。(remote_addr是直接和nginx通信的IP)如果我们访问不是直接访问到服务端而是由中间代理进行(如上图),访问控制这时就会失效。
局限性解决方法总结:
方法一: 采用http头信息控制访问,如HTTP_X_FORWARD_FOR
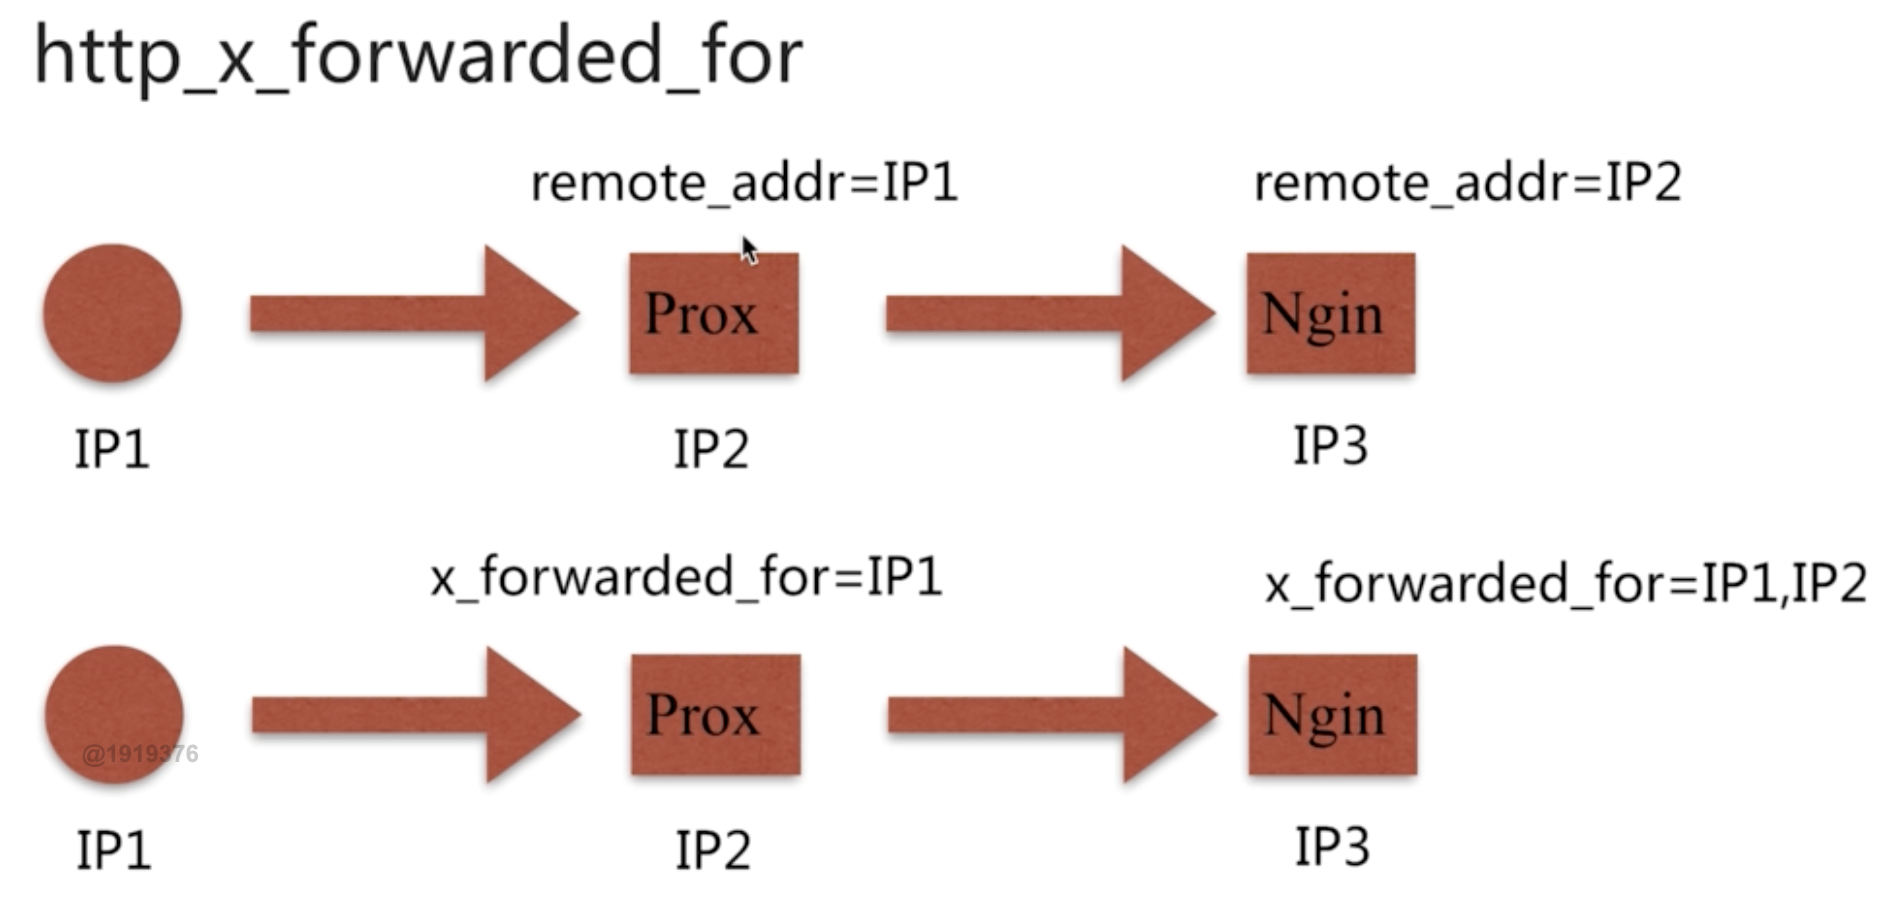
http_x_forwarded_for头信息控制访问 会更好的解决该问题,它要求访问时必须带上所有用到的ip的地址信息
我们看一下http_x_forwarded_for记录过程:
1 | http_x_forwarded_for = Client IP, Proxy(1)IP, Proxy(2)IP,... |
http_x_forwarded_for也有一定的局限性,例如代理没有适配这个协议,被篡改等。
方法二: 结合geo模块
方法三: 通过HTTP自定义变量传递
通过自定义变量,将IP一层一层加入到定义的变量中。
http_auth_basic_module模块
配置语法
1 | Syntax: auth_basic string | off; |
语法讲解:auth_basic 默认关闭,开启的话输入一段字符串即可。auth_basic_user_file 该文件存储用户账号密码。
我们看一下官网的文件格式1
2
3
4# comment
name1:password1
name2:password2:comment
name3:password3
密码加密方式有多中这里我们使用htpasswd1
can be generated using the “htpasswd” utility from the Apache HTTP Server distribution or the “openssl passwd” command
想要使用该方式,首先要装对应的包1
[root@hongshaorou conf.d]# yum -y install httpd-tools
接下来创建对应的use_file文件
1 | [root@hongshaorou nginx]# htpasswd -c ./auth_conf hongshaorou(用户名) |
配置Nginx
1 | location ~ ^/admin.html { |
我们再次访问页面就会要求我们使用刚才配置的账户密码登录。
局限性:
一: 用户信息依赖文件
二: 操作管理机械,效率低
解决方式:
一: nginx结合LUA实现高效验证
二: nginx配合LDAP打通,利用nginx-auth-ldap模块